What you must consider before installing an EV Charger for your home
Share
As electric vehicles (EVs) continue to gain traction, a robust, safe, and efficient charging infrastructure is essential. Whether you’re a homeowner looking to install a Level 2 charger or a facility manager implementing multiple charging stations, a technically sound installation is key. In this comprehensive guide, we’ll walk through the technical aspects of EV charger installation, including planning, electrical considerations, installation best practices, and commissioning.
Electrical Considerations
Circuit and Power Supply
Dedicated Circuit:
EV chargers should be installed on a dedicated circuit. This minimizes interference and ensures that the charger has a stable power supply.
Power Rating and Phasing:
Single vs. Three-Phase:
Level 2 chargers commonly operate at 7–22kW. For faster charging speeds, three-phase power is typically required.
Output Specifications:
Verify that the charger’s output—voltage, current, and power (kW)—matches your facility’s electrical capacity. For instance, a 22kW charger on a three-phase system may require an output current of approximately 32A per phase.
Wiring and Cabling
Cable Sizing:
Correctly sized cables are critical to avoid voltage drop and overheating. The cable gauge should meet the current rating of the charger, accounting for the installation length and ambient temperature.
Circuit Protection:
Install appropriate circuit breakers and Residual Current Devices (RCDs) to provide overcurrent, earth leakage, and short circuit protection. Typically, chargers include built-in RCDs, but additional circuit protection may be required per local codes.
Load Balancing and Smart Features
Dynamic Load Management:
Advanced chargers come equipped with load management features to balance the power draw from the home or facility. This is crucial in environments where multiple high-power appliances are running concurrently.
Integration with Renewable Energy:
For installations incorporating solar photovoltaic (PV) systems, consider EV chargers with CT clamps or energy balancing capabilities. This enables the charger to utilize excess solar generation and prevent grid overload.
Installation Process
Pre-Installation Setup
Pre-Configuration:
Many modern EV chargers come pre-configured to simplify the installation process. Verify that the device settings match your electrical supply requirements (voltage, phase configuration, etc.).
Safety Checks:
Prior to installation, perform a comprehensive safety audit. This includes verifying the integrity of the existing electrical infrastructure and ensuring that the installation area is free of hazards.
Mounting and Physical Installation
Mounting Options:
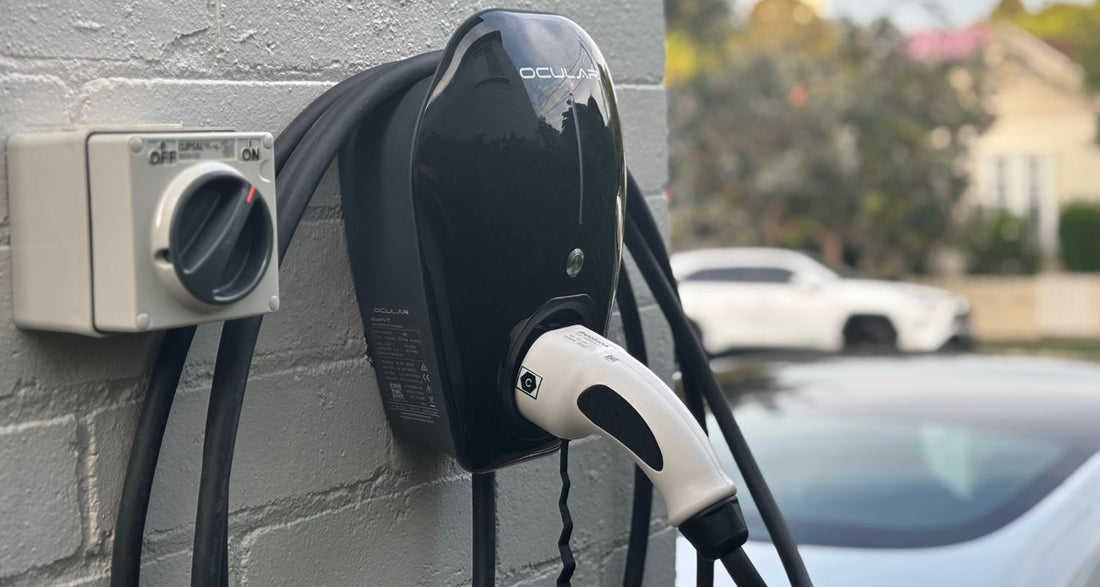
Wall-Mounted:
Ideal for residential installations, wall-mounted chargers save space and allow for secure installation.
Pole/Stand-Mounted:
In commercial settings, chargers can be mounted on poles or stands, providing flexibility in design and accessibility.
Cable Management:
Integrate built-in cable holders or external cable management systems to protect the EV cable from environmental damage and ensure a tidy installation.
Electrical Connections
Wiring the Charger:
Connect the charger to the dedicated circuit. Ensure all connections are secure and follow manufacturer guidelines, especially when hardwiring the charger.
System Integration:
Communication Protocols:
Modern chargers may feature Bluetooth, WiFi, or Ethernet connectivity for remote monitoring and control. Integrate these features as needed, ensuring that any app-based functionalities are set up correctly.
Smart Home Integration:
If the charger is part of a smart home system, ensure proper integration with other devices for features like scheduling and energy monitoring.
Commissioning and Testing
System Verification
Initial Power-Up:
After installation, perform an initial power-up to verify that the charger activates correctly. Check that all display indicators (e.g., LCD, LED lights) function as intended.
Fault Diagnostics:
Use built-in diagnostics and the charger’s smartphone app (if available) to ensure no non-hardware faults persist. Manual overrides should be tested to confirm that they are responsive in case of an emergency.
Performance Testing
Load Testing:
Simulate typical charging scenarios to confirm that the charger operates at the expected power levels without tripping circuit breakers or causing voltage drops.
Environmental Testing:
Verify that the charger maintains performance under various environmental conditions (temperature, humidity, etc.). This is particularly important for outdoor installations.
Maintenance and Ongoing Considerations
Regular Inspections
Visual and Electrical Inspections:
Schedule regular inspections to ensure that all physical connections remain secure and that there is no wear or damage to the wiring and mounting structures.
Firmware and Software Updates:
Stay current with any manufacturer updates for the charger’s firmware or app, ensuring optimal performance and security.
Troubleshooting Common Issues
Diagnostic Tools:
Use the charger’s diagnostic readouts and app alerts to troubleshoot common issues such as connectivity problems, minor faults, or unexpected power fluctuations.
Professional Servicing:
Engage a licensed electrician for any issues beyond routine maintenance, especially those involving high-voltage components.